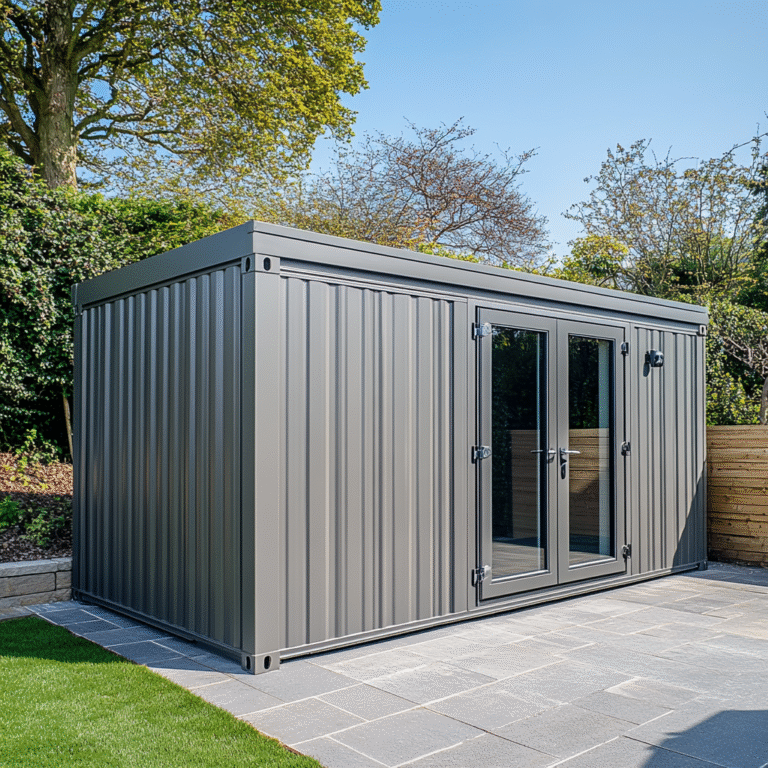
With remote work, side hustles, and creative hobbies on the rise, homeowners across the country are reimagining how their spaces work for them. For those who live in Denver, where outdoor living, innovation, and compact urban design intersect, there’s growing interest in using unconventional spaces in stylish, functional ways.
One of the most exciting trends? Converting a storage container Denver into a fully functional mini studio right on your property. Whether you’re craving a quiet spot for remote work, an inspiring art studio, or a backyard retreat for writing, yoga, or music, a portable container offers a flexible and surprisingly design-forward solution. Let’s explore how you can transform a simple storage unit into a personalized space that reflects your creativity and lifestyle.
Why Use a Storage Container as a Mini Studio?
Portable storage containers offer more than just convenience, they offer freedom. With limited space inside many Denver homes and apartments, especially those close to downtown or in revitalized neighborhoods like RiNo or Highland, adding a traditional home extension isn’t always practical or permitted.
Here’s where a storage container comes in:
- Delivered directly to your home
- Weather-resistant and lockable
- Customizable from the inside out
- No need for long-term construction crews or permits (in many cases)
And when your needs change? The unit can be removed, relocated, or repurposed, all without breaking down walls or disrupting your living space.
Design Tip 1: Define the Purpose First
Before you start adding paint swatches and mood boards, define the exact function of your mini studio. This will determine everything from layout to storage needs.
Some common container studio uses include:
- Home office or remote work zone
- Art or photography studio
- Crafting or sewing room
- Reading nook or writing retreat
- Meditation, yoga, or fitness pod
- Small-scale podcast or music studio
Knowing your primary use will help you decide on everything from insulation types to flooring and lighting.
Design Tip 2: Light It Up Right
Containers are sturdy but can feel closed off without natural light. Depending on your budget and comfort level with DIY, you can:
- Install sliding glass doors or windows on one or both ends to bring in natural light
- Add skylights or solar tubes for vertical brightness
- Use LED strip lighting, dimmable overheads, or clamp lamps for layered lighting
For artists and crafters, north-facing natural light can help prevent color distortion, while photographers might prefer controllable, indirect lighting setups.
Design Tip 3: Temperature Control Is Key

Denver’s seasons can be extreme, sunny and warm one week, snowy and crisp the next. If you’re converting a storage container into a year-round studio, insulation is non-negotiable.
Consider:
- Spray foam insulation for the best temperature regulation and soundproofing
- Rubber or wood flooring to reduce cold air transfer through the floor
- Mini split HVAC systems for compact heating and cooling
Even small improvements like weather stripping and draft stoppers around windows and doors can go a long way in making your container cozy.
Design Tip 4: Add Style Through Smart Materials
Just because you’re working with a shipping container doesn’t mean you need to settle for a bland, industrial vibe—unless that’s what you want, of course.
Here’s how to bring your style into the space:
- Use wood cladding or reclaimed barn wood on the walls for a warm, rustic look
- Paint with bold or muted colors that inspire your creativity
- Hang curtains, tapestries, or acoustic panels to soften sound and elevate style
- Incorporate floating shelves, pegboards, or vertical storage systems to save floor space
Your container should reflect your aesthetic and inspire your work, so don’t hold back on decorative details that make it feel like your space.
Design Tip 5: Use Storage Cleverly

A creative space is only functional when it’s organized. With limited square footage in a container, storage must be efficient and vertical whenever possible.
Try:
- Tall shelving units with labeled bins
- Overhead storage racks for seasonal items
- Magnetic strips for tools or scissors
- Rolling carts that tuck under workstations
- Foldable desks or Murphy-style furniture for flexibility
If your mini studio doubles as storage for gear, hobbies, or seasonal decor, be sure to divide the space into “creative” and “utility” zones.
PODS and the Denver Homeowner
While there are many storage and moving companies out there, few match the urban adaptability and convenience that PODS offers in a place like Denver. The company delivers containers directly to your driveway or yard and picks them up when you’re finished—ideal for temporary studio setups or long-term creative use.
Because PODS containers come in different sizes, you can choose one that fits your property and purpose without overcommitting. And thanks to their durable steel build, they’re secure enough to house valuable equipment, electronics, and supplies, even during Denver’s unpredictable weather.
Bonus: Containers That Move with You

Let’s say you fall in love with your container studio, and eventually move to another neighborhood or property. The beauty of a portable setup is that it moves with you. A professional container provider can transport your fully packed studio across town or even across the state. That kind of mobility is rare in custom home design, and it gives creatives unmatched flexibility in a growing city like Denver.
Designing your own at-home creative space is more accessible than ever – especially when you think outside the usual four walls. By transforming a storage container into a mini studio, you gain a private, stylish, and flexible area tailored to your passions. Whether you’re painting, planning, or podcasting, your container studio can be the inspirational retreat you’ve been missing, all without the cost or commitment of a traditional build. Ready to bring your creative vision to life? All it takes is a well-placed container and a little imagination.
0
Related
Read the full article here


