A family media room has always been on my home must-have list, so when we moved into our 1960s detached house in Worcestershire four years ago, I set about working out how to create one. The front of the house had an ugly car port that was too narrow for a modern car, so I drew up plans to create an infill extension. I took my time trawling through living room ideas before coming up with a plan that we could achieve on our budget.
We financed the project through a loan and knew the maximum we could spend, including all furniture, tech and finishing touches, was £30,000. Considering how much an extension costs in the UK (around £2,000 per m2), and our finished room would be 27.5m2 – our calculations meant it should cost closer to £55,000 for the build alone. But using a combination of savvy planning and DIY, we managed to bring it in on budget.
1. We got the basics right
Because the car port was at the front of our house, I knew we’d need to apply for planning permission for the extension. We didn’t need an architect as I had a clear idea of what I wanted the layout to be like. Instead, I paid a local CAD designer to draw up the floorplans and elevations we needed, then managed the planning application with our local authority myself.
We also needed a structural engineer to calculate the size of the steels we’d need. In total, these fees came to £500. Building regulations approval through our local authority, came in at another £600.
To keep costs down, I designed the extension to use three existing walls – two on the house and one on the garage. This meant the building work, including a 3m aluminium window and a 2x2m rooflight, came in at £18,000. I halved the size of an existing large downstairs toilet to give us the easiest access to the new space.
2. We were savvy with our media wall design
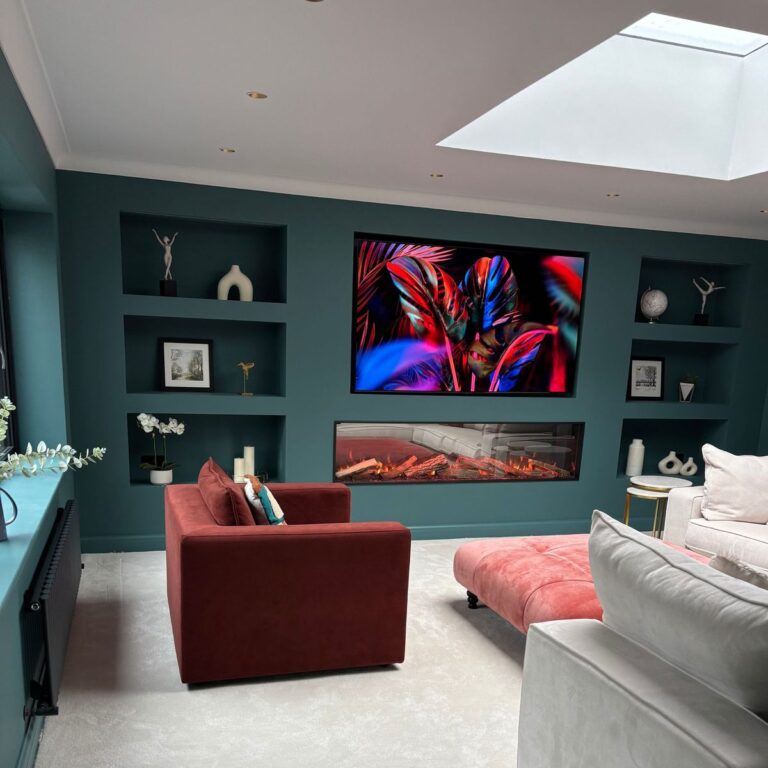
For me, the media wall aspect of this new space was key. It needed to look good but also function. Hours on YouTube and Instagram helped me draw up plans for a studwork media wall with LED strip lighting and space for integrated TV. I hate wires and cables being on show, so I designed a shelf space to be hidden behind the TV where we have a wireless booster, TV boxes and games consoles.
We looked at various options for heating the room but decided on an electric fire as we could install it ourselves and it didn’t need any flues adding or planning permission. The room is 5.5m wide so we looked for the biggest fire we could find and settled on this 190cm Onyx Avanti electric fire..
Onyx Avanti 190rw Inset Electric Wall Fire
This electric fire offers a realistic flame appearance, mood lighting and can be controlled by remote control or via an app.
We opted for real logs to sit in the bottom which make it look as real as possible – although my daughters insist on having pink flames, which might not be quite as realistic! Part of the fun is being able to adjust the colours, flame height and heat output using either the remote control or app.
We have a smaller snug where we try not to use the TV but for this room we knew we wanted the biggest and best-quality TV we could find. We built an alcove to fit a 77’’ flatscreen TV on a mount that pulls out to allow easy access behind. The Samsung S90C QD-OLED is incredibly slim so perfect for wall mounting. I like brains with my beauty and this TV performs, offering crystal-clear picture, great gaming (according to the husband) and sound that gives a cinema experience at home.

Samsung 77″ S90c Oled 4k Hdr Smart TV
3. We really thought about finishing touches
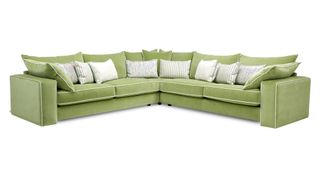
There’s no point having a great TV and roaring fire with nowhere to sit and enjoy them, so we hunted high and low for a big sofa without a giant price tag. The Joules Gilmorton corner sofa is really big (320x320cm), super comfy and brilliant value. It also comes in sections, which we needed due to the narrow access to the room. The buttoned footstool has already doubled as a stage for the girls, as well as doubling up as a handy coffee table when we pop a tray on it.

This corner sofa from DFS is large, comfy and perfect for the media room – we opted for the Cotton colourway, and went for the matching buttoned footstool in Coral
The room is north facing so I decided to embrace that and paint in a dark blue-green called Tea with Florence, from Little Greene. To add extra warmth, I chose an accent chair and cushions from Dusk in a rust colour.
4. We did what we could ourselves
Given that we’d spent £20,000 of our £30,000 budget on the building work and permissions, we knew DIY was the only way we’d get the look we’d wanted without overspending. We spent every spare moment we could taking on tasks that would save us money – from installing the insulation to plasterboarding and my husband being the electrician’s apprentice!
We used YouTube tutorials to build the media wall from studwork. This is where our forward planning came in to it’s own as we built the frame to fit the TV and fire we’d chosen – there’s no way we could have added these in at the last minute.
I’m the decorator in the household, so I sanded, mist coated and painted the walls, ceiling and woodwork myself, which saved us another chunk of money.
Doing so much DIY has meant the room has taken three years from start to completion, but it’s been well worth it as we’ve learnt so many new skills and saved at least £25,000 on what we’d have paid contractors to do the work for us. We’ve now got the perfect family media room – even if it has taken a while to get it!
Read the full article here


