


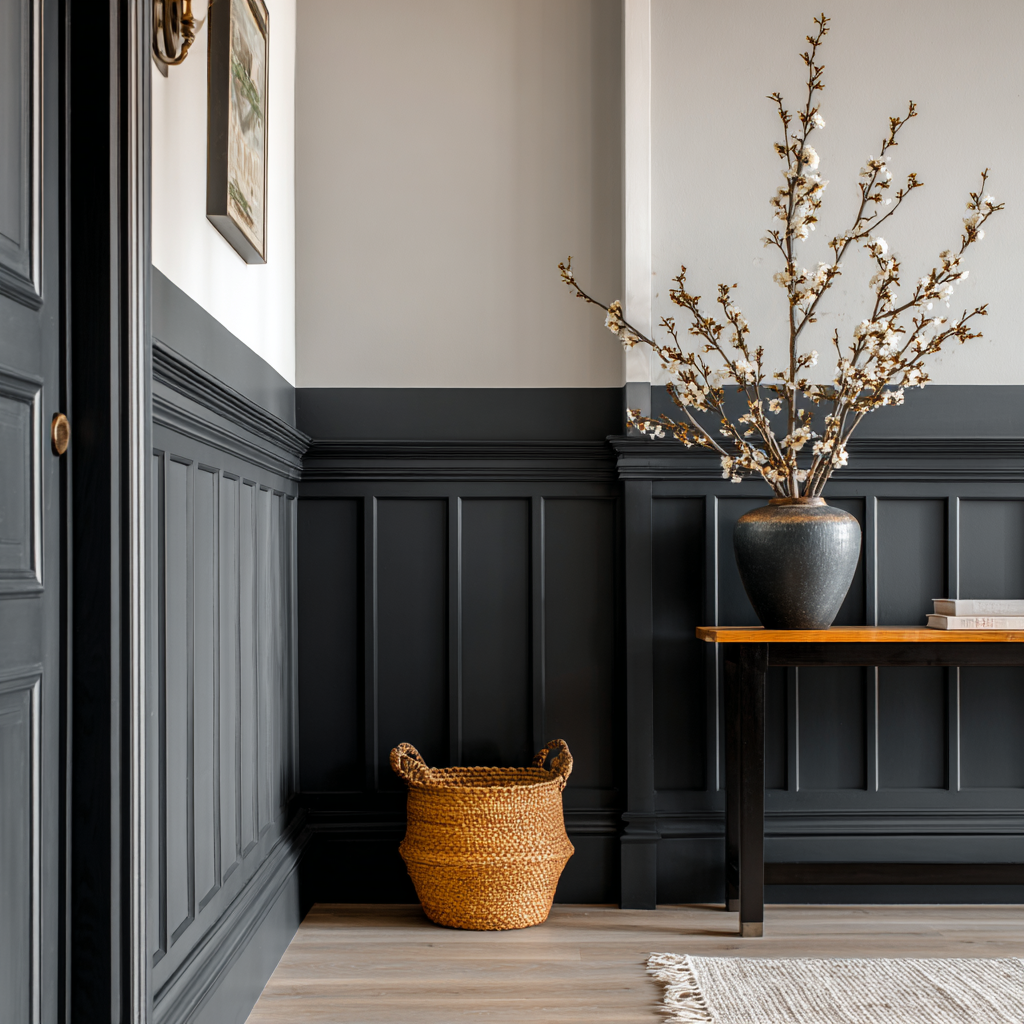
If you’ve ever strolled through a historic home or admired a beautifully finished hallway, there’s a good chance you’ve spotted the charming touch of wainscoting. It’s that elegant wall treatment that seems to whisper timelessness while giving off serious design cred. But what exactly is wainscoting? Is it just for period homes? Can you have it in your modern condo? In this article we’re exploring everything you need to know about wainscoting, from what it is and where it works best, to the materials, costs, and even some budget-friendly alternative options to consider.
What Is Wainscoting?
At its core, wainscoting is a decorative wall covering that typically covers the lower portion of interior walls, usually the bottom third or so. Originally designed for practical purposes, like protecting plaster walls from scuffs, dents, and dampness, it’s now equally loved for its decorative appeal.
Wainscoting typically consists of a series of panels framed by moldings or rails. It’s most commonly installed from the baseboard up to chair rail height, though some styles go higher for dramatic effect. Think of it as both armor and art for your walls.
A Brief History of Wainscoting
Wainscoting has roots that stretch back to 16th-century Europe, particularly in England and the Netherlands. Initially, it wasn’t purely decorative; it served a very practical purpose. Homes built with stone or timber often had cold, damp interiors, and panel wainscoting provided a wooden barrier to help insulate rooms and protect walls from moisture and wear. Early wainscoting was typically made from high-quality oak, meticulously hand-carved by skilled artisans.
As building methods and materials improved, wainscoting transitioned from necessity to luxury, becoming a mark of elegance and refined taste in 18th-century Georgian and Victorian interiors. Notably, in grand English manor houses and Dutch townhouses, intricate raised panel designs became a symbol of wealth and sophistication. Even the Palace of Versailles features paneling inspired by wainscoting, adding to the allure of woodwork as an art form.
By the 19th century, the Industrial Revolution allowed for the mass production of wainscoting materials, making it more accessible to middle-class homeowners. Beadboard styles, popularized in seaside cottages and farmhouses, brought a more casual, cozy aesthetic to the look we love today.
Where Does Wainscoting Work Best?

One of the joys of wainscoting is its versatility. While it might have originated in the dining rooms and hallways of Georgian mansions, today it finds a cozy home in:
- Entryways & Hallways: These high-traffic zones benefit from the durability wainscot paneling offers, and the visual interest helps break up long stretches of wall.
- Dining Rooms: Classic and elegant, wainscoting in dining areas creates a sense of formality and warmth.
- Living Rooms: Whether you’re going for cozy cottage or crisp modern vibes, the right wainscoting adds depth and personality.
- Bathrooms: Yes, moisture-resistant materials make wainscoting a charming and practical choice for bathrooms.
- Stairwells: A dramatic backdrop for your staircase, especially when paired with a gallery walls.
Basically, if there’s a wall, there’s a way to wainscot it.
Materials: What Are Wainscoting Panels Made Of?
Today, wainscoting can be crafted from several materials, and your choice often depends on your budget, room type, and desired look.
- Solid Wood: Traditional and durable, solid wood is the gold standard. It can be painted or stained and offers a timeless, high-end finish.
- MDF (Medium-Density Fiberboard): A budget-friendly and stable alternative to wood, MDF takes paint well and resists warping.
- PVC & Vinyl: Moisture-resistant and perfect for bathrooms or basements. It mimics the look of wood without the risk of rot.
- Plywood: Often used in DIY installations, it’s affordable and can be finished to resemble more expensive materials.
- Reclaimed Wood: For a rustic or eco-friendly vibe, reclaimed wood panels add character and texture.
Each material brings its own aesthetic and practical advantages, so consider your space’s needs when choosing.
How Much Does Wainscoting Cost?

Costs can vary widely depending on materials, room size, labor, and design complexity. Here’s a rough breakdown:
- DIY Kits: $1.50–$6 per square foot for materials like MDF or PVC.
- Professional Installation: $8–$20 per square foot, or more for intricate designs or premium wood.
- Custom Woodwork: $25+ per square foot, especially with ornate designs or exotic woods.
So, for a modest bathroom or hallway, a DIY project might run a few hundred dollars, while professionally installed, high-end wainscoting in a large dining room could cost several thousand.
Budget Planning by Room Size
| Room Type | DIY Cost Range | Professional Install |
| Small Bathroom | $200–$400 | $800–$1,500 |
| Hallway (10 ft) | $250–$500 | $900–$1,800 |
| Dining Room | $500–$1,200 | $2,000–$4,500 |
| Stairwell | $400–$900 | $1,800–$3,500 |
Styles of Wainscoting

There’s more than one way to wainscot an entire wall and there are various styles and different colors available.
Beadboard wainscoting is perhaps one of the most popular styles. Beadboard wainscoting panels feature narrow vertical planks — usually around 2 to 3 inches wide — with a distinctive “bead” or indentation between each board. Originally created by fitting tongue-and-groove boards together, modern beadboard often comes in large panels that offer easy installation.
It’s a classic favorite in cottages, beach houses, and farmhouse-style homes thanks to its relaxed, homey vibe. Beadboard adds instant charm and texture to a space and is especially popular in bathrooms, kitchens, mudrooms, and cozy breakfast nooks. Painted white or in soft pastel hues, it brings brightness and character to any room.
Installation-wise, beadboard is one of the more DIY-friendly wainscoting styles, especially if you opt for pre-cut panels, so is the best choice if you want to go down the DIY route. Just attach the panels to your wall with adhesive and nails, add a chair rail and baseboard, caulk and paint – and voilà! You’ve got timeless charm on a budget.
Other common styles of wainscoting are:
- Raised Panel: The OG of wainscoting, with panels that appear to float above the rails and stiles. This style is all about depth and dimension. The central panel is elevated, bordered by beveled edges, creating a shadowbox effect that’s both elegant and substantial. Raised panel wainscoting was a staple of Colonial and Georgian architecture and still works beautifully in formal dining rooms, studies, or entryways.
- Flat Panel (or Recessed Panel): This streamlined option features panels set behind the rails and stiles, creating a clean and modern look in an interior space. It’s a favorite in Craftsman, Shaker, and Mission-style homes. Flat panel wainscoting is perfect if you’re after a subtle architectural element that adds clean lines and structure without overpowering the room.
- Board and Batten: Think rustic charm meets dramatic flair. This style uses wide vertical boards with thin vertical battens covering the seams. The strong vertical lines draw the eye upward, making ceilings feel higher. It’s a go-to in farmhouse, cottage style and transitional interiors and works well on tall walls or staircases.
- Overlay: A hybrid between raised and flat panels, overlay wainscoting begins with a flat panel and adds shaped moldings on top to give the illusion of raised panels. It’s a versatile choice that can be dressed up or down depending on your choice of moldings and finishes. Great for creating a customized, high-end look without the intricate joinery.
Each style lends a different feel of accent wall — some formal, some relaxed — so choose one that complements your home’s personality.
Style Selection by Design Aesthetic
| Wainscoting Style | Best For Home Style | Formality Level |
| Beadboard | Cottage, Coastal, Farmhouse | Casual |
| Raised Panel | Colonial, Georgian, Traditional | Formal |
| Flat Panel | Craftsman, Shaker, Modern | Moderate |
| Board and Batten | Farmhouse, Transitional | Casual-Moderate |
| Overlay | Versatile/Customizable | Adjustable |
Pros of Wainscoting
Why are so many homeowners smitten with wainscoting? Here are some of its best features:
- Aesthetic Appeal: Wainscot wall panels add architectural interest and visual texture.
- Protective: Great for preventing scuffs, especially in high-traffic areas.
- Value-Boosting: Often considered a premium feature, wainscoting can bump up your home’s perceived value.
- Versatile: Complements a wide range of interior styles, from traditional to modern farmhouse.
- Customizable: Can be painted in any color and adapted to almost any height or layout.
Cons of Wainscoting
While it’s a design darling, wainscoting isn’t without a few caveats:
- Cost: Quality installation of traditional wainscoting can get pricey, especially with custom woodwork.
- Installation Complexity: DIYers beware—accurate measuring and cutting are crucial, and walls aren’t always as straight as you think.
- Space Shrinkage: In smaller rooms, dark or high wainscoting can make the space feel more enclosed.
- Maintenance: Painted wainscoting may need touch-ups over time, and wood versions may require more TLC.
Wainscoting vs. Paneling: What’s the Difference?

People often use the terms wainscoting and paneling interchangeably, but they’re not quite the same. Wainscoting refers specifically to wall treatments that cover only a portion of the wall, typically the bottom third to half. It’s a subtype of paneling.
Paneling, on the other hand, can extend from floor to ceiling and includes everything from rustic knotty pine planks to sleek modern wood slats. Think of wainscoting as a more tailored, decorative form of paneling with roots in traditional interior design.
DIY Wainscoting: How Easy Is It?
Thinking of rolling up your sleeves and tackling wainscoting yourself? Good news—many homeowners have successfully DIYed their way to stunning results. Here’s what you need to know to create your own traditional wood wainscot panels in your home.
Skill Level: Intermediate. If you’re comfortable using a tape measure, saw, level, and nail gun, you’re off to a strong start. Beginners can still manage it with a little patience and careful planning.
Time Commitment: Depending on the room size and design complexity, a DIY wainscoting project can take anywhere from a weekend to a full week. Pre-made kits or beadboard panels can significantly speed things up.
Basic Tools Needed:
- Measuring tape and level
- Miter or circular saw
- Nail gun or hammer and finishing nails
- Stud finder
- Caulk and wood filler
- Paint or stain
Step-by-Step Instructions:
- Plan Your Design: Choose the style and height of your wainscoting. Sketch a rough layout and calculate materials.
- Prep the Walls: Remove existing baseboards (if necessary), fill holes, sand the walls smooth, and clean the surface.
- Mark the Layout: Use a level and pencil to mark where the top of your wainscoting will be. Map out vertical lines for stiles or battens.
- Cut Materials: Measure and cut your panels, boards, and moldings to size.
- Install Baseboard: Attach the new or existing baseboard to the wall first to anchor the bottom.
- Attach Panels: Secure panels or boards to the wall using construction adhesive and finishing nails into studs.
- Add Vertical and Horizontal Trim: Install stiles (vertical pieces) and rails (horizontal pieces) over the panels.
- Top Rail and Cap Molding: Finish the top edge with a rail and optional decorative cap molding for a polished look.
- Fill and Sand: Fill nail holes and gaps with wood filler or caulk. Once dry, sand everything smooth.
- Paint or Stain: Apply primer if needed, then paint or stain your wainscoting to your desired finish.
Pro Tips:
- Measure twice (or three times!) before cutting—walls are rarely perfectly straight.
- Prime and paint your wood paneling boards before installing to save time and reduce mess.
- Use painter’s tape to map out your layout on the wall first. This helps visualize spacing and design.
- Don’t skip the caulk — it hides gaps and makes the whole installation look polished and professional.
DIY wainscoting is a satisfying project that can yield professional-looking results with the right preparation. Plus, it gives you bragging rights every time someone compliments your walls!
Essential Tools and Their Purpose
| Tool | Purpose | Can You Skip It? |
| Stud Finder | Locates secure nailing points | No – critical for stability |
| Level (4-ft) | Ensures straight installation | No – prevents crooked lines |
| Miter Saw | Makes precise angled cuts | Maybe – hand saw works slower |
| Brad Nailer | Fast, secure attachment | Yes – hammer works too |
| Caulk Gun | Fills gaps for polished look | No – essential for finish |
Choosing Wainscoting Colors

The color you choose for your wainscoting can dramatically influence the feel of a room. Here’s a quick guide to help you match colors to your home’s style:
- Traditional/Colonial Homes: Stick to classic white wainscoting, creams, or soft neutrals. Rich wood stains like mahogany or cherry also feel right at home.
- Modern Farmhouse: Go for crisp whites, muted grays, or soft sage greens. Board and batten styles in a soft matte finish are especially charming.
- Coastal/Beach House: Light, breezy colors like pale blue, seafoam green, or sandy beige bring in that relaxed seaside vibe. White beadboard is a perennial favorite.
- Craftsman and Mission Styles: Earthy tones such as olive green, warm taupe, or deep russet complement the strong lines of flat panel wainscoting.
- Contemporary Spaces: Try bold contrasts, such as charcoal gray, navy blue, or even black against light-colored walls. Sleek flat panels or minimalist board and batten work best.
- Victorian or Grand Traditional: Deeper, richer tones like burgundy, forest green, or navy can create a dramatic, formal effect, especially with ornate raised panels.
If in doubt, you can’t go wrong with a clean white or a soft neutral tone – they fit almost every style and brighten up a room effortlessly.
The Color Temperature Trick That Makes Wainscoting Pop

Here’s what almost no one tells you: the success of your wainscoting isn’t just about the color you choose – it’s about the temperature contrast between your wainscoting and your upper walls. This single principle separates amateur installations from magazine-worthy results.
The Contrast Framework
Cool Wainscoting + Warm Upper Walls
Gray or blue-toned wainscoting paired with cream, beige, or warm white upper walls creates groundedness while keeping the room feeling open. Perfect for north-facing rooms that need warmth.
Warm Wainscoting + Cool Upper Walls
Cream or greige wainscoting with crisp white or light gray above adds sophistication without stuffiness. Ideal for south-facing rooms with abundant natural light.
The Monochromatic Exception
The same color top and bottom only works when you vary the sheen – use satin on wainscoting and matte above, or vice versa. The light reflection creates subtle definition that photographs beautifully.
Test Before You Commit
Paint two foam core boards – one in your wainscoting color, one in your wall color. Prop them against your wall at the planned height and observe them at different times of day. Morning light, afternoon light, and evening artificial light will all reveal different undertones. If the combination looks muddy or flat in any lighting condition, adjust the temperature of one color.
Color Choices by Room Function
| Room Type | Best Color Choices | Effect Created |
| Dining Room | Navy, forest green, burgundy | Formal elegance |
| Bathroom | White, soft blue, pale gray | Clean, spa-like calm |
| Hallway | Warm gray, greige, cream | Welcoming flow |
| Living Room | Soft white, sage, taupe | Cozy yet open |
Budget-Friendly Alternatives
Love the look of wainscoting but not the price tag? There are plenty of creative ways to get the wainscoting vibe in your home without busting your budget. Here are some practical and fun ideas for creating your own modern wainscoting wall paneling.
- DIY Beadboard Panels: Available at most hardware stores, these panels are easy to cut and install with a bit of adhesive and brad nails.
- Wallpaper Illusions: Textured wallpapers that mimic beadboard or paneling can trick the eye and save big bucks.
- Painted Molding Frames: Use simple picture frame molding to create faux panels directly on your drywall. A coat of matching paint ties it all together.
- Peel-and-Stick Options: Some companies now offer stick-on panels that resemble wood or beadboard—great for renters or commitment-phobes.
- Plywood Sheets: Cut plywood into panels or strips for a custom look at a fraction of the cost.
Final Thoughts: Is Wainscoting Right for Your Home?
Wainscoting is like the little black dress of interior design – classic, flattering, and endlessly adaptable. Whether you’re dressing up a formal dining room, adding texture to a hallway, or creating a cozy vibe in your bathroom, it offers a blend of beauty and function that few wall treatments can match.
Of course, not every room needs it. Sometimes less is more, and wainscoting in just one or two key areas can be more impactful than going all in. But if you’re after something that bridges the gap between architecture and décor, wainscoting is a stellar option.
So go ahead, let your walls wear a little wainscot. They’ll thank you with timeless style, and maybe even a little extra resale value down the line.
Related Posts
Best materials for wall panels
Benefits for wood wall paneling
Embracing wood paneling for a warm home makeover
Mixing and matching: How to combine wood paneling with other materials
0
Related
Read the full article here